HELP CENTER
GETTING STARTED WITH
Dorsia OS Events
This guide provides step-by-step instructions for using the Dorsia Event Management Platform to manage guest lists, ticketing, and table bookings for events.

GETTING STARTED
Managing Guest Lists
Log into https://os.dorsia.com using your phone number or email address.
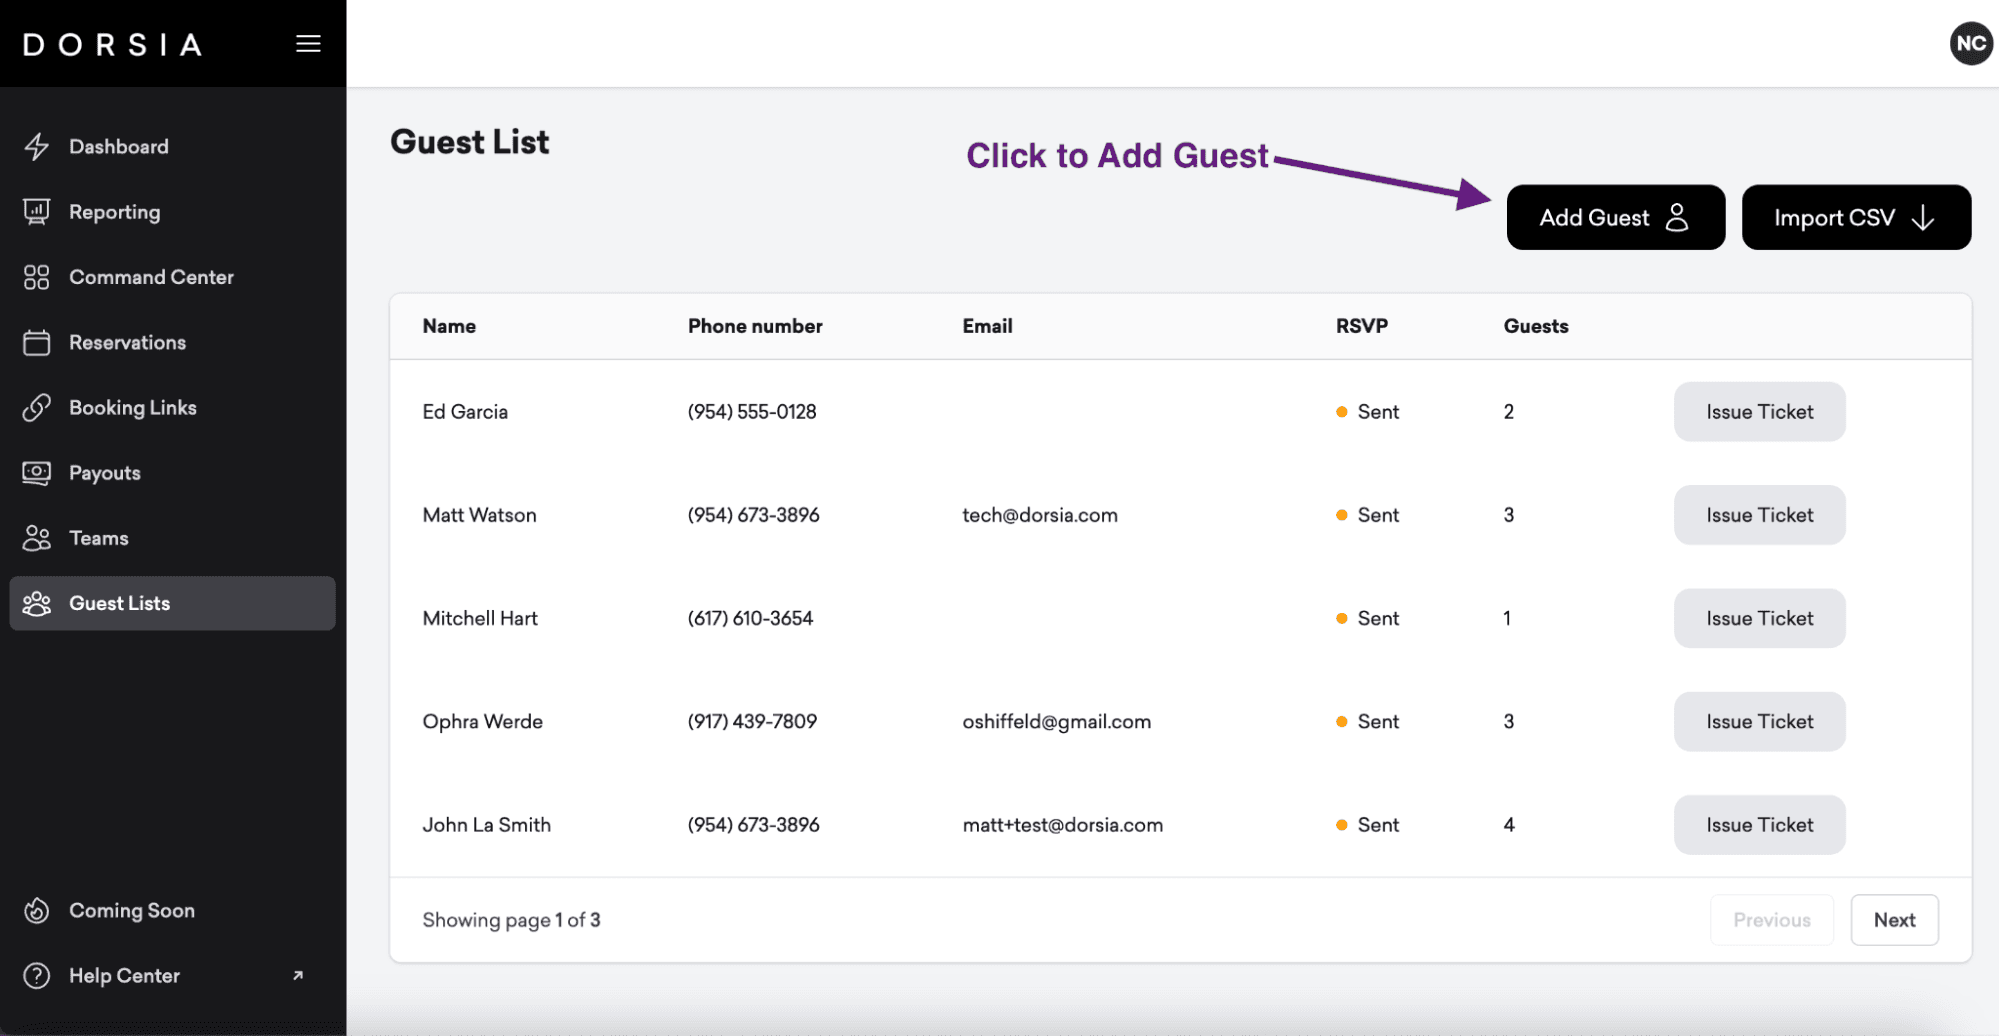
Set Up Guest List: choose the "Guest List" option on the sidebar. Here, you can:
Choose the date of the event you are sending invites for
Type in guest information individually (name, phone number, email, total +1 guests).
Upload a CSV file containing multiple guest entries.

Once a guest is added they will receive an invite via text or email invite.
Tracking RSVPs: Monitor guest responses through the admin panel, where you can see the status of each invite (pending, confirmed, declined).

SEND TABLES
Issuing Table Booking Links
Log into https://os.dorsia.com using your phone number or email address.
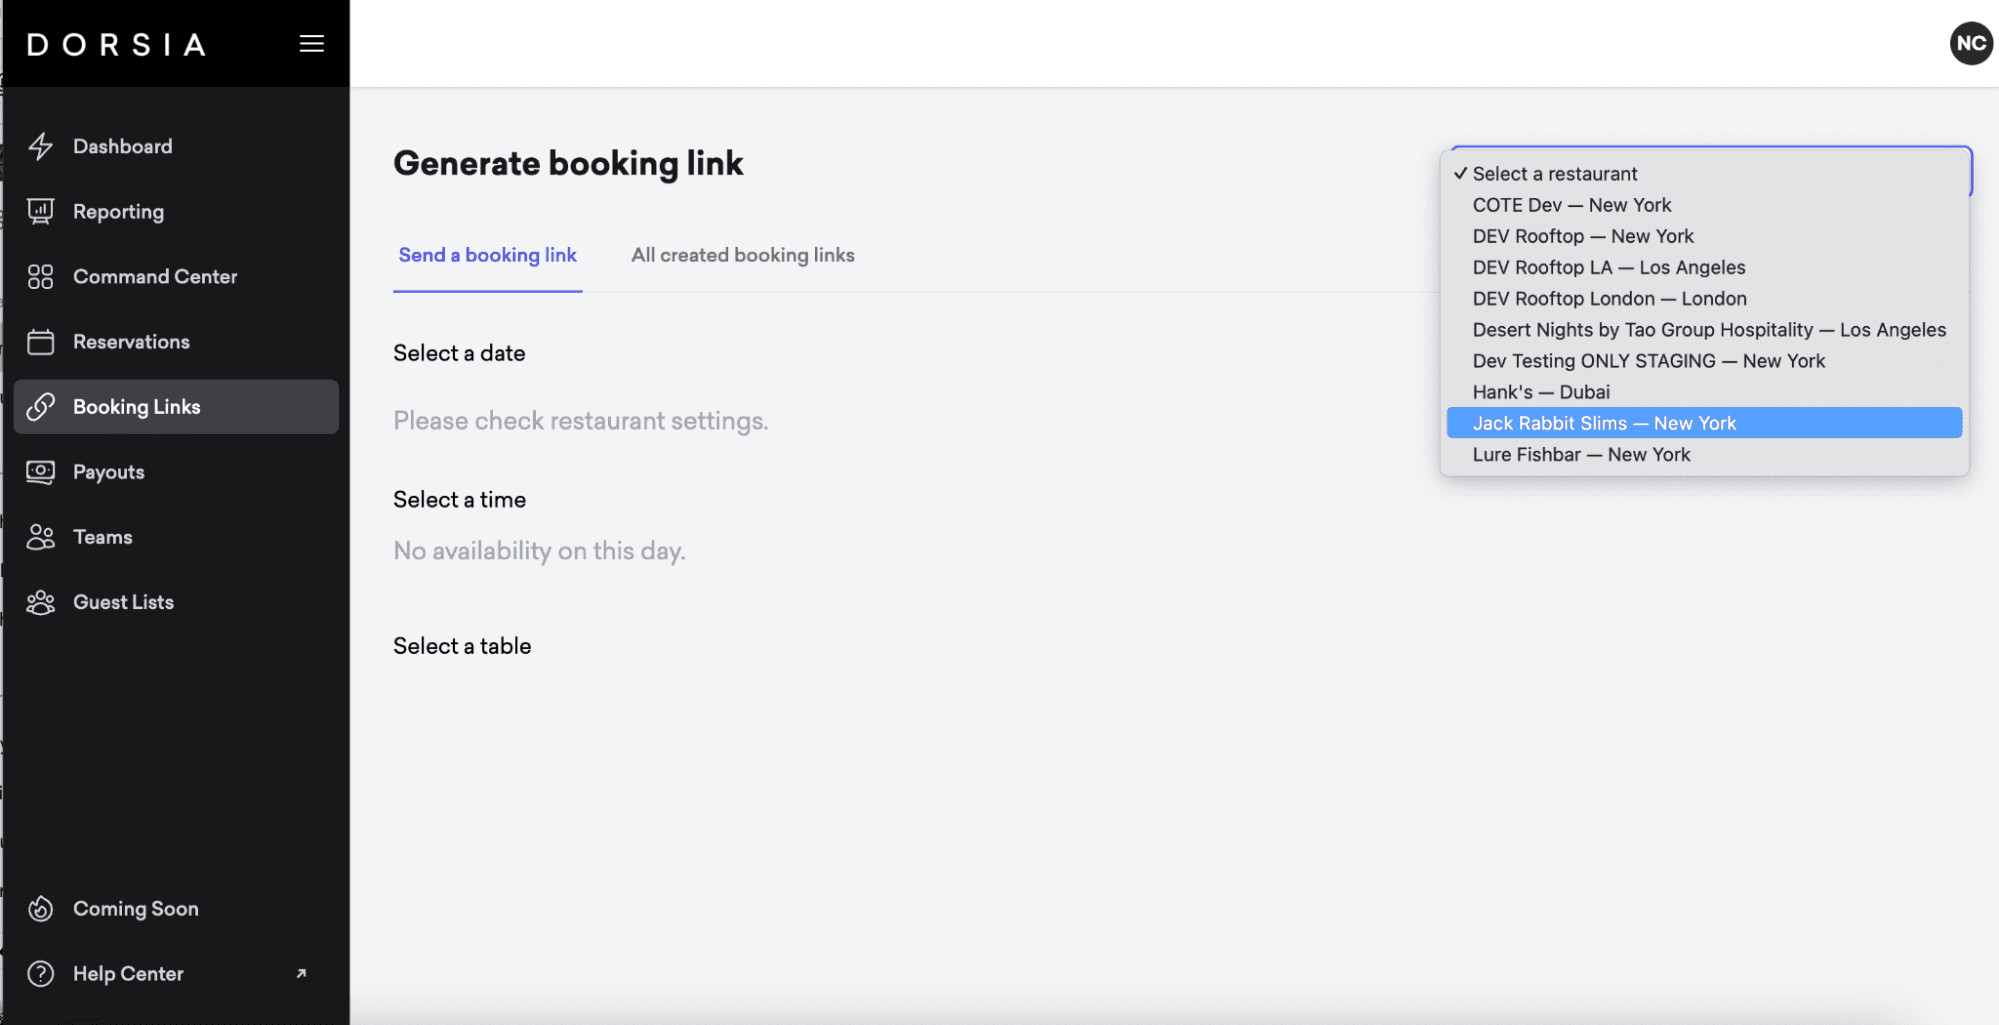
Manage Table Bookings: Select the "Booking Links" option.
Select the applicable restaurant or event from the dropdown

Select the date, time, and table. Tables will indicate the party size and pricing.
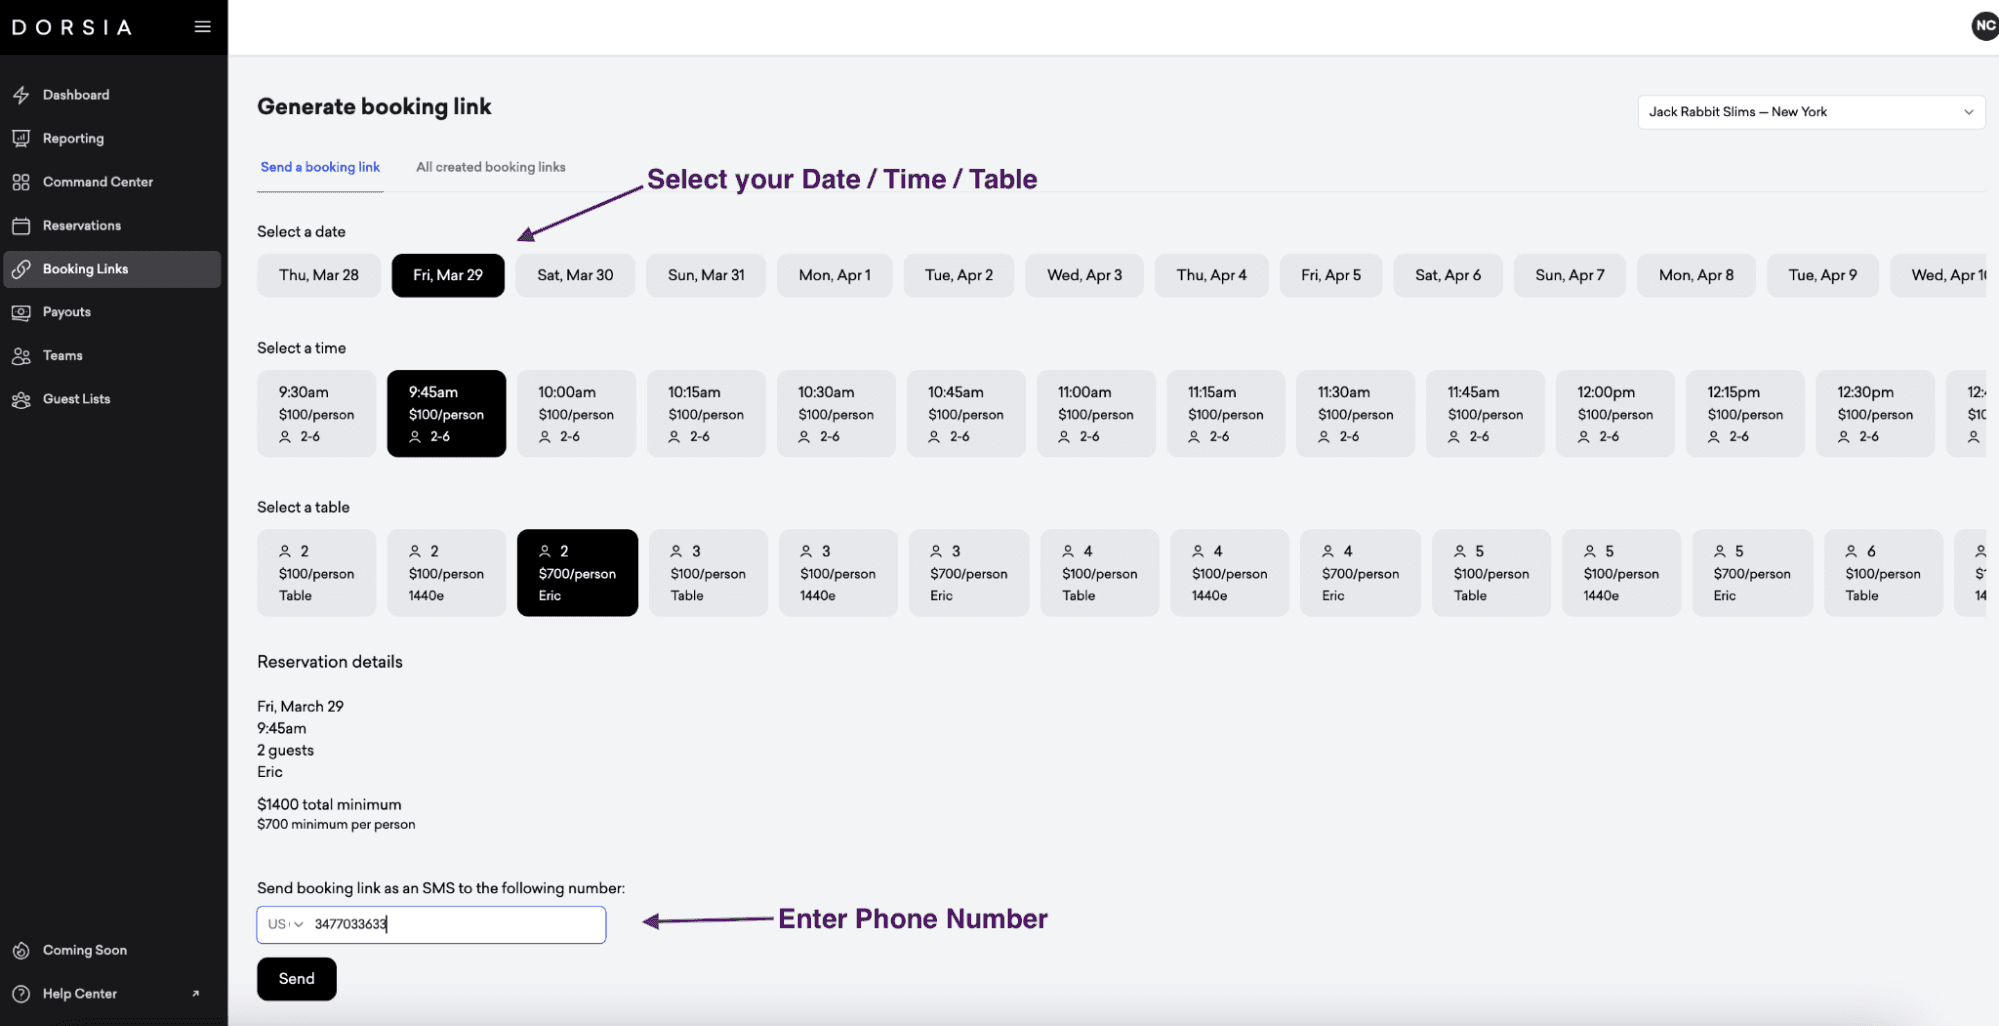
Enter the guest’s phone number, and submit. This will send them a text message to confirm their reservation and pay.
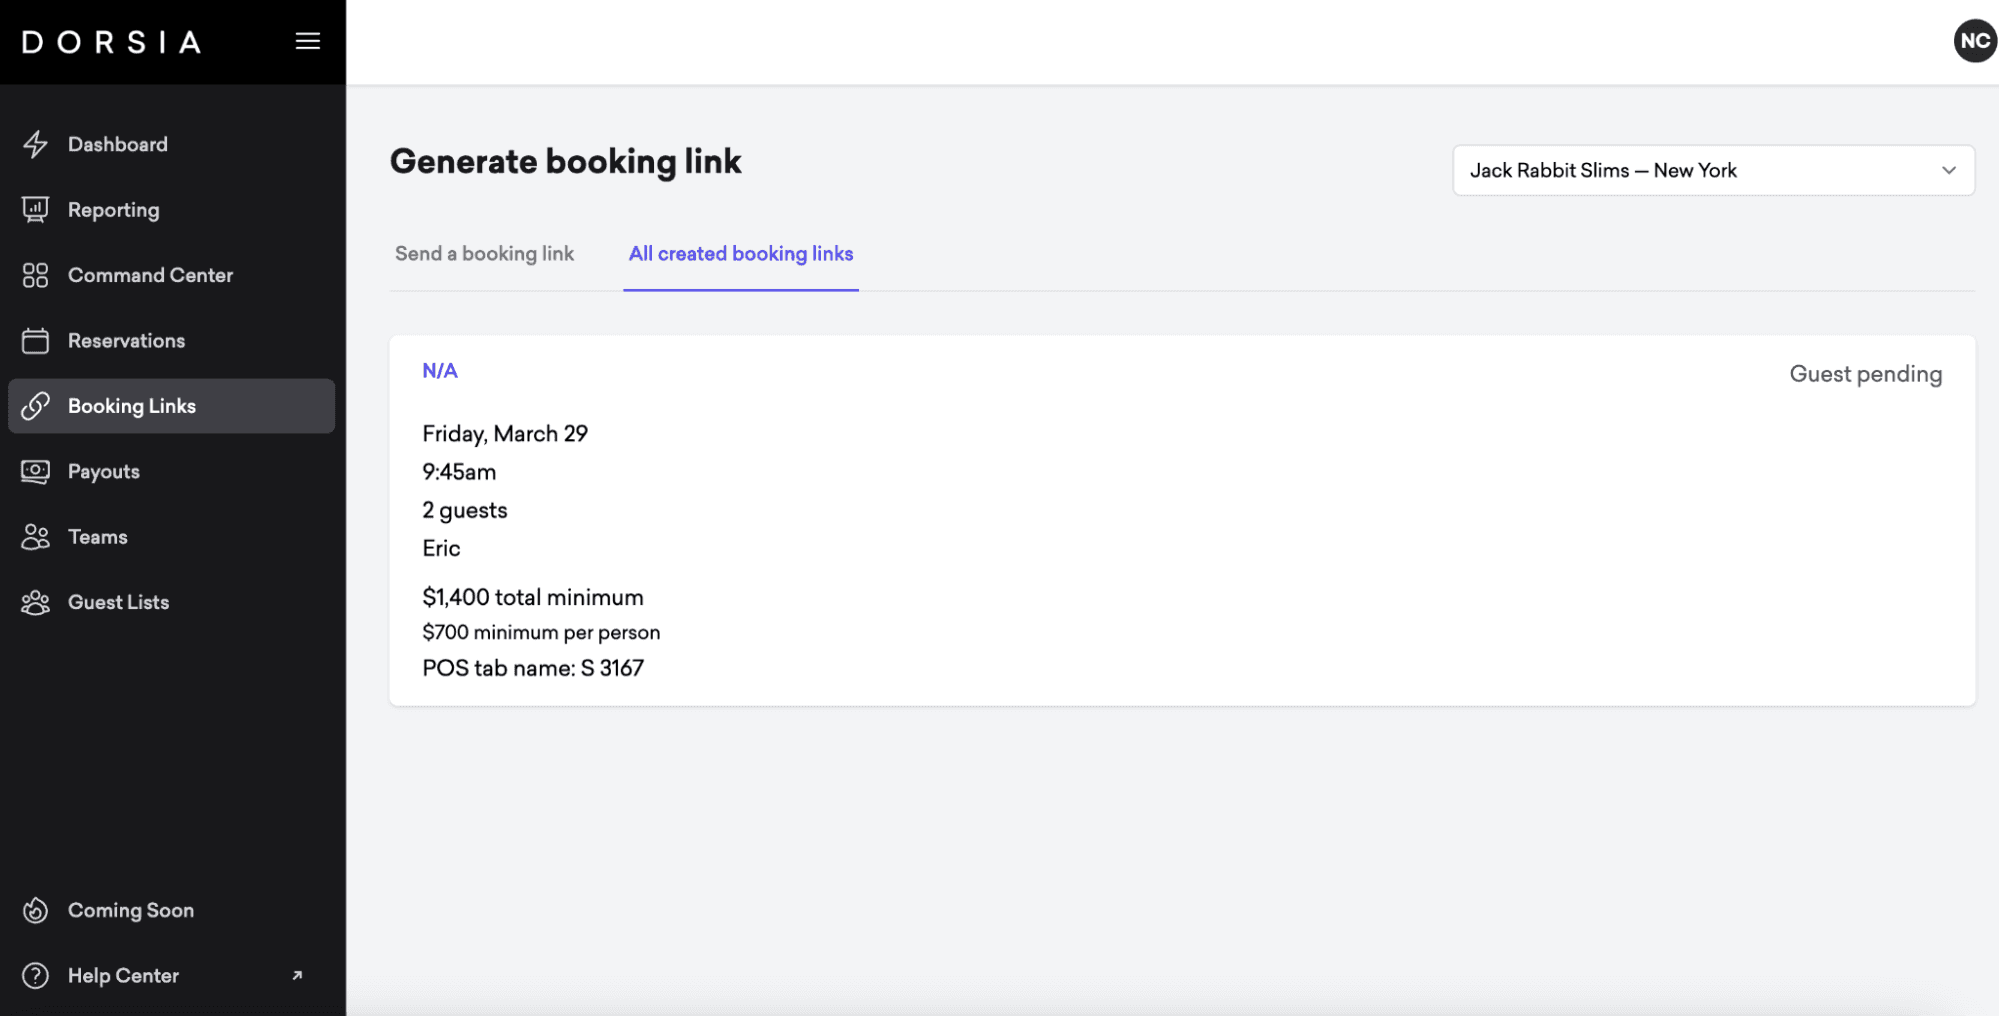
Sent booking links: you can see the historical booking links sent under the “All booking links” tab.